Get It Growing: Dividing, propagating angel wing begonias
Published 1:30 am Wednesday, May 19, 2021

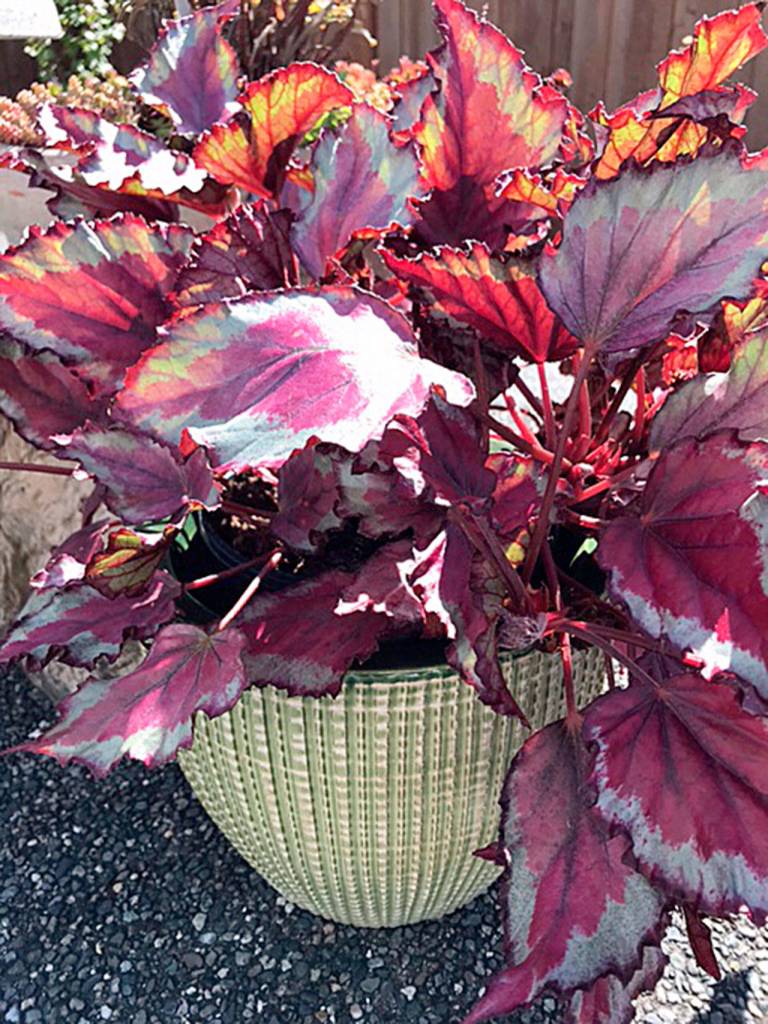


How many times have you thought about saving the gorgeous angel wing begonia that you have enjoyed on your patio from one season to the next? Or, perhaps you have over-wintered a favorite begonia in your garage only to find it has outgrown its container?
My begonia falls into the latter category — too big for its container after being perfectly happy for at least seven years. Last summer, there were fewer blooms on very weak stems.
Division
So, this is the year to give it some tough love. It makes the journey every fall into the garage, where it receives a bit of light through a window. With no watering from early November until mid-February, it somehow manages to survive.
The soil is extremely dry when I start to give the plant small doses of water weekly after President’s Day. How exciting it is to see new growth sprouting from that old root ball that looks like a gnarled tree trunk.
Once I see some new growth this year, I will remove the plant from the container and place it on several layers of newspaper or a tarp. Cutting the root ball into smaller sections with a sharp knife and, keeping some of the old roots, should result in many viable new plants. There should be several sprouts of new growth on each section.
Place each new plant division in a pot of fresh potting soil. Water the pots and set them on a tray of wet gravel or marbles to keep the area around the plants humid — a diluted dose of fertilizer every week will be most welcomed by your new plants.
When warmer weather permits, move the new plants outdoors.
Propagation
If over-wintering in your garage is not an option, you can try propagating your begonia by taking 4- or 5-inch cuttings in late summer or early fall.
Tip-cuttings or stem cuttings can be used for propagation, as long as there is at least one leaf near the top of the cutting. Using a sharp knife, make your cut approximately one-quarter-inch below a leaf node.
Remove leaves from the bottom two-thirds of the stem or tip, leaving one or two leaves at the top portion of the cutting; those leaves will be enough for photosynthesis and root development.
Dip the cutting in a rooting hormone, following the manufacturer’s directions. This step is not essential, but will help to ensure success.
Use a 4- to 5-inch container, with drainage holes, filled with coarse sand or germinating medium. Stick a pencil into the rooting medium to a depth of approximately 2 inches. Insert no more than three or four cuttings into the 4- to 5-inch container. Firm the soil around the cuttings and water when all the cuttings are in place.
In order to create a dome of humidity around the cuttings, insert three dowel sticks, evenly spaced around the outer edges of the pot. Cover with plastic wrap and secure with string or tape, keeping the plastic off the leaves. Place the pot in bright light, out of direct sun. Water often enough to keep the growing medium moist but not wet.
By using either of these methods, you should have plenty of new begonias to give to friends, especially those who commented favorably on that lovely, colorful begonia seen on your patio last summer.
Marilynn Elliott is a veteran Clallam County Master Gardener.